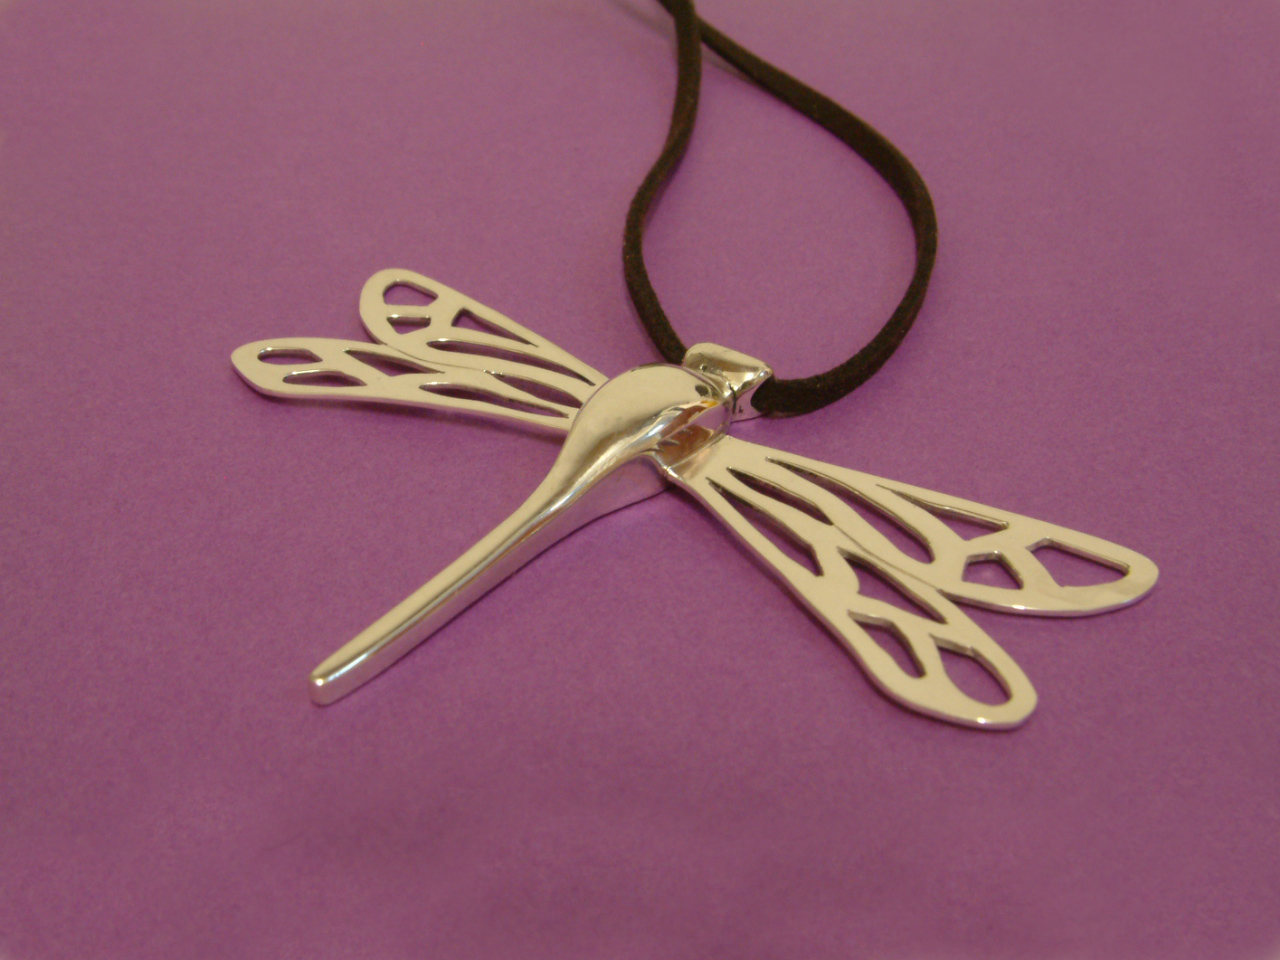
A commission I finished just the other day.
It was commissioned especially for a ladies 50th birthday.
The pendnat is approx 2 inch long and 2 1/2 inches wide.
Three different coloured leather thongs were supplied for the necklace.


| ||
| If you wonder why you struggle to make a sale, here is why. This will apply to a lot of categories. I did a rough check for earrings listed on the 28th and there are approx 130 pages with 15 listings per page. Taking that as the average per day , obviously there will be busier days. Please take the following maths as rough approximates. So if you sell earrings and list 2 per day, 14 a week, you make up 0.1% of the total earrings for sale each week. If you list 2 items a day for a month, you might think that your shop with 56 items has a lot of stock. However after 4 months, your 54 items will account for a quarter of one tenth of a percent (0.025%)of all earrings listed. Even if someone does a search for silver, earring, drop, bead, you will still be buried in the sheer number of listings. So to ensure that you have a single listing per page on the earrings, you will need to list one item every 11 minutes, all day long , every day. I have put this post together simply to outline why some people listing 30 items over a 2 day period, might make a sale or two, but then get nothing for weeks and weeks. What are your thoughts? |
 This is a great tip if you work with a dremmel or a pendant motor.


 Just finished these earrings today and loaded them onto Etsy.


Here is my little shop & workshop.
Pop in to see me if you live near to Gravesend, Kent, UK. Here I am on Google Maps|
Chris Parry Newsletter
|
|
Be the first to hear about special offers,new products and sales.
I do not pass your details onto third parties. (Required fields are bold)
|


