Sunday 16 December 2007

Just finished these two rings.


Two recent commissions finished. The ring on the left was for Bev. A total of 1.50ct diamonds set in platinum and the ring on the right was for a lovely lady called Clare. Her principal diamond was 1.27ct.

Ring Stands


Beth Milner posted a great tutorial for making earrings stands. Click on her name to see the post on her excellent blog.

It reminded me of these ring stands that I made about 7 years ago for an exhibition.

They are simply made from steel binding wire and the uppermost end was balled up under a flame.

They were then painted with enamel paints.

I wanted them to have a shabby look, so I left the wires slightly crooked, and only gave them one thin coat of paint.

Friday 14 December 2007


Here is todays finished commission. A ring with the letters M and E entwined ona shield. Finished off with some hand engraving and a black oxidized background.

The shield is set atop a chunky 4mm x 2mm oval ring shank.

If you like this and would like your own custom design, initials, word or picture, just get in touch.

Monday 10 December 2007

Step by step sapphire earrings.


Here are some step by step pictures of Star Sapphire earrings, being made in 18k white gold.

(Above Left) shows two beautiful star sapphires. Unforunately the photos don't do them justice. The screwback ear posts were used as these earrings were quite expensive.

Having cutout the metal I required from sheet, the first thing to do , was to create a setting for each stone.

(Above Right) shows me bending the long thin piece of gold into circles to match the stones perfectly.


(Above Left) you can now see, that I have made a perefect setting for each stone. You can see the setting to the front of the picture still has the residue of the solder on the seem. I am not worried about it at this stage, as there is still more soldering to be done.

(Above Right) I am now offering the circles upto a slightly thicker sheet of 18k white gold. this will act as a base. To stop the stones falling


(Above Left) Each round setting has now been soldered onto a heavier base. This now needs to be trimmed to create a prettier setting.

(Above Right) The earposts are now soldered onto the base of each earring. The suplus gold is trimmed with a saw, and then filed and sanded down until the whole setting is nice and round.


Here is the finished pair of earrings. The stones have been set and both have been highly polished.

Handmade especially for Sarah and commissioned by her husband Dan.

Saturday 8 December 2007

Spreadsheet for pricing your work.


I have decided to trial a FLEXIBLE-PRICING strategy for my spreadsheet - basically pay what you want. Read through to the end and then you decide how much to pay.

One of the hardest things for a crafter to do , is to get to grips with pricing their work.

No doubt you have been sent here for my pricing spreadsheet on the recommendation of others.

If you read the 90 plus comments below, you will see that just those who had the time to leave a message, have found my spreadsheet most useful.

The spreadsheet has now been downloaded over 30,000 times and I am so glad that it has helped so many improve their pricing strategy and they have actually started to earn more as a result.

The spreadsheet and the NEW e-book which explains my pricing concept are now available in my Etsy shop.


SO WHO IS IT FOR?

Crafters, artisans, artists, makers. Whatever you call yourself, if you sell your handmade pieces, then this spreadsheet and the accompanying e-book are just perfect for you. If you want to grow your business, to understand where you are going wrong (and right) with your current pricing, then you are about to make the right decision.

WHAT YOU'LL LEARN

How I moved from working at home in my basement with all the spiders, into a small residential shop and then just recenlty into a new larger shop in the middle of the town centre. This was all done on the back of my pricing strategy. I will talk you through the simple concept of pricing your goods in an e-book, along with the famous spreadsheet.

10 years ago, I listed my first item for sale on Ebay. I sold it. I worked from home, using Ebay, later my own personal website to build my business. Everything I have today, is from the efforts of my craft. In short my pricing strategy works.

You'll learn about which of your items makes you money and which doesn't

HOW WILL IT BENEFIT YOU?

Simple. You will be in a position to charge properly for your goods, to eliminatte the lines that don't make you money. You will be well placed to grow your business, as I did from working at home into a business that can support you and indeed, might require you to move into business premises.

SO WHY, THREE YEARS AFTER RELEASING THIS SPREADSHEET, AM I NOW CHARGING FOR IT?

I have created a very worthwhile product that has helped hundreds and hundreds of crafters. I have found other people ripping off my spreadsheet and passing it off as their own work (complete with my spelling mistakes !!!) I have spent a lot of time in the forums listening to feedback.

I have created a spreadsheet that will make you more confident in pricing your goods and should pay you back for your small investment quite easily.

In addition to the spreadsheet, I have also written an e-book that explains the concept thoroughly, which I hope you will find an illuminating read.

THE ONLY QUESTION TO ASK YOURSELF

Do I want to learn Chris's pricing strategy and take my business seriously at a cost of only £15 or should I just continue doing what I have always done?

==============
As mentioned above you can now pay what you want for a trial period.


It's a trial, it's an honesty and generosity thing and it really is upto you.

Simply click on the donate buttonand select an amount in GBP. Currently the files have been selling on Etsy for £15.  Once paid via Paypal I will receive your order.

Please REMEMBER, that I work 9am-5pm GMT (London) time, so your files will be sent within those hours of work once I receive your payment.
So if you order in America and I am still in bed, I will send the files once I am at work. If you order after 5pm GMT on a Saturday, then I will not be in work until 9am GMT Monday. Please allow for this small timezone for your files to be sent.

THIS FLEXIBLE PRICING STRATEGY may be withdrawn without notice.

Tuesday 4 December 2007

Making a Punch

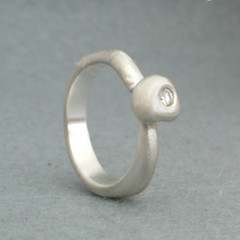
Barnaby wanted one of my rings , but with a heart symbol on it, and I just didn't have a heart shaped punch.

So here is how I made the heart shaped punch.

You start with some tool steel, this is 4mm round rod.


This was then annealed. It is heated to roughly 1,000 deg c, until it glows orange.

It is left to cool on its own, so that the steel is as soft as possible.


The soft steel is now filed and sawn until the round end resembles the shape you are after, in this case a heart.


Here is the completed punch. The heart is 1.4mm high and 1mm wide. Quite small.


Another pic of the new heart shaped punch.

When I have finished, the punch is too soft to use, so it needs to be hardened.

The steel is heated again until it is that cherry red colour and then it is quenched immediately in cold water.

This turns the soft steel into very hard steel.

If you forget this step, the punch will lose its shape after a dozen uses.


A test punch is carried out onto a piece of scrap silver to make sure it leaves the correct impression.

I am quite happy with how the heart has turned out.


Here is the finished commission.

BR (hearts) JK


Hope you found that interesting.

Sunday 2 December 2007

Belly Button Padlock.


Here is one of the more unusual commissions that I have recently undertaken.

Brian asked me to make a sterling silver padlock for a belly button piercing.

The hoop of the padlock is actually surgical steel and is held in place by a small recessed screw on the side of the padlock. The key was made to fasten and unfasten the screw.

It was all made from scratch, just for Brian's lucky wife.

Saturday 1 December 2007

Stu's Bracelet


Click on the pics if you would like to see a larger image.

Stu commissioned a design for a bracelet for his significant other. It was a personal design and with some tweaking this is the result.

With a design in hand, I cut some silver wire to length.


This was then bent to match the design.


The silver curves were then soldered together.


A piece of sheet silver was soldered into place and a stylized M was cut into the sheet.

The M and the large curvy S of each link represent the initials of the happy couple.

Rings were also soldered onto the ends to enable the bracelet to be linked together.

Four of these initial links were joined together and a bar and hoop were added for the catch.

Here is the result, a unique sterling silver bracelet.

Friday 30 November 2007

Dragonfly Pendant


A commission I finished just the other day.

It was commissioned especially for a ladies 50th birthday.

The pendnat is approx 2 inch long and 2 1/2 inches wide.

Three different coloured leather thongs were supplied for the necklace.

Thursday 29 November 2007

Slow sales in Etsy?

chrisparry

If you wonder why you struggle to make a sale, here is why. This will apply to a lot of categories.

I did a rough check for earrings listed on the 28th and there are approx 130 pages with 15 listings per page.

Taking that as the average per day , obviously there will be busier days. Please take the following maths as rough approximates.

So if you sell earrings and list 2 per day, 14 a week, you make up 0.1% of the total earrings for sale each week.

If you list 2 items a day for a month, you might think that your shop with 56 items has a lot of stock. However after 4 months, your 54 items will account for a quarter of one tenth of a percent (0.025%)of all earrings listed.

Even if someone does a search for silver, earring, drop, bead, you will still be buried in the sheer number of listings.

So to ensure that you have a single listing per page on the earrings, you will need to list one item every 11 minutes, all day long , every day.

I have put this post together simply to outline why some people listing 30 items over a 2 day period, might make a sale or two, but then get nothing for weeks and weeks.

What are your thoughts?

Magnets !

This is a great tip if you work with a dremmel or a pendant motor.

If you are like me and are forever changing the burrs, drill bits and other accessories then read on.

I purchased some niobium magnets (also called rare earth magnets) 6mm x 3mm. You can see several of them stuck to each other in the front of the photo. They are little round discs, not dissimilar to watch batteries.

On a convenient part of your workbench, simply drill some 6mm diameter holes 3mm deep. Then push into this perfect hole, one of your magnets. These magnets are so powerful, that when you drop one of your drill bits onto them, they stand to attention. You can even see my hand piece spanner on one of the magnets.

So when you are working away, they are easy to pick up, easy to distinguish which one is which and this is just an overall fab idea.

Let me know your workbench tips and I will post any good ideas here.

Wednesday 28 November 2007


As promised here is the picture of my DIY file storeage compartment.

I had a small void next to my jewellers bench, so I cut 16 x 9inch lengths of plastic drainage pipes, which fit snuggly into the void.

The pipes are the sort that take your waste water away from under the sink. They are roughly 1 1/2 inch in diameter.

They make perfect compartments for files and sanding sticks. Although I have fit them inside a box on my purpose built bench. You could as easily glue them together and have them sit on top of your bench either horizontally, at an angle or vertically.

I have got another fab tip which I will save tomorrow for anyone who has a pendant motor/ dremmel drill. You will think it is just the bees knees and it is so simple.

Tuesday 27 November 2007

Bespoke Platinum Engagement Ring - for Sue


OK. Just finished a platinum engagement ring. The client wanted a traditional princess claw set ring. Here is a step by step process of how it was made.

The first process was making a wax blank that had the maximum dimensions of her ring.


I found the center of the wax at the top and cut a seat for the diamond to sit in.You can see the princess diamond on the top.

You will also be able to see faint lines on the front of the wax. This denotes the shape of the ring.


The lines were used to cut away the wax. The area around the diamond is now being trimmed back and you can start to see the shape of the ring coming through.


Now I have got the overall shape right from the front, I need to refine the shape of ring shank. You can see from this shot, that I have marked out the width of the ring.

These lines will be used to cut back the shank.


The ring shank has been cut back and you can see that I have tapered the setting of the diamond.


The setting is further refined as the client wanted a claw setting.


Light holes are opened up through the shoulders of the ring and through the setting.


The finished model is then moulded using a special rubber compound. This photo shows the liquid rubber up to the half way mark within the mould.

This liquid rubber, sets quite firm. The wax model then has to be cut out, using a sharp knife.


Here is the resulting rubber block. the model of the ring is encased within this block and is released using a very sharp knife.

This is part of the "Lost Wax Casting " process which I will not bore you with.


Here is the finished platinum ring. A perfect copy from the model that I created.

Made especially for Sue.

New pair of earrings.

Just finished these earrings today and loaded them onto Etsy.

In fairness, they have been sat on my bench for several months, just never got around to soldering on the ear posts.

I also created a skull and a bunch of other bones to make a ring, but again this is sat on the bench in bits. When I get some spare time, I will solder them together to make a lovely skull and bone ring.

Monday 26 November 2007

The Shop - First Pics.


Here some photos of my shop in sunny Kent.

One is taken from the door, looking in and the other from behind my workstation.

I now have a number of "other" goods for sale within the shop covering several different disciplines. Ceramics, cloth bags, leather bags, plushies, felt brooches, wooden gifts, fairy dolls, handmade greeting cards, original artwork, limited edition prints and of course my own jewellery.

I will elaborate on some of the Etsy items I have for sale in another post.

Got to get back to the grindstone.

Sunday 25 November 2007

Back to the blog.........

well , after opening my shop this year March 2007, I have been quite busy with just about everything.

So I have lots and lots to tell you about, and my new commitment is to add a blog entry daily. Some times it will be about the shop and the new items i am stocking. Sometimes it will be about the work of others that I have come across.

So my first bit of news is that I have discovered the wonders of Etsy.

You can visit my Etsy shop www.chrisparry.etsy.com
You can of course visit my regular website www.chris-parry.co.uk
or indeed you can pop into the shop in Gravesend, Kent, UK.

Saturday 14 April 2007

Ceramics Galore

I have just had my order of beautiful ceramics arrive.

I fell in love with the work of a ceramacist in Brighton and I am now stocking her excellent work. It arrived well packaged this morning whilst I was speaking to a client and I couldn't wait to unpack it.

It is now all out on display and just awaiting the right person to come and fall in love.

Thursday 12 April 2007

Back after Easter.

I had a long Easter break, largely because my kids were off school and my wife and I have to juggle who is looking after them and when.

So I am back to the PC with more spam e-mails than you can shake a stick at. My two little plants in the shop nearly died !!! ooops. I have these two plants in big square planters that I put outside the shop when I am open. I bring them in when I close the shop otherwise they would end up on someone's patio overnight !!! The heat in the shop and lack of water made them look a little sorry for themselves. I should take them home when I close for long periods, it is worse than having kids !

Back to work, lots of little jobs to catch up with.

Wednesday 11 April 2007

The start of my blog.


Welcome to my blog. This will just be a daily (OK when I remeber) account of my life as a jewellery designer/maker. I specialise in making bespoke items for clients that can't find exactly what they are after in the shops or just want soething a little different from everyone else. I make all manner of jewellery items in silver, gold and platinum. I design and make everything with nothing being mass produced. anyhow, that is enough for day one. Feel free to drop me a line or visit my web site at www.chris-parry.co.uk

Chris